The application is called Wanted. Each time you find something that you think you want, you add it to your Wanted list. The Wanted list shows items that have one of two statuses: those that have passed a time threshold (say, two weeks) that are considered true wants, and those that have not. The theory is that you hold off on opening your wallet for a Wanted item until it has been around long enough that it is considered a true want. Hopefully in the time it takes for an item to pass the time threshold, you will have changed your mind about its importance, saving you some money. The Wanted application has a simple model (Wanted items) and a CRUD interface.
Step 1 -- Preparation
To get started, we need to have a Smalltalk implementation and Seaside installed. The Smalltalk implementation used for this tutorial is Squeak, but Seaside is also available for Cincom Smalltalk and Dolphin Smalltalk--consult the Seaside download page to see if your favorite implementation has a port. Using Smalltalk actually requires two things: a VM that executes Smalltalk code, and an image that stores the Smalltalk code the VM executes. You can find the latest release-ready Squeak VM + Image combination on the Squeak homepage in the upper right corner (as of this writing, the latest file is Squeak-3.9xxx.zip, where "xxx" is some OS-specific designation). Download the appropriate version for your OS and unpack it.
This tutorial will be using the Squeak.org VM, but not the default Squeak.org image. We're going to use Damien Cassou's squeak-web image found here. It contains Seaside, plus several developer niceties that the default image doesn't. Download the latest version (as of this writing, the latest file is "squeak-web-72.zip") and unpack it.
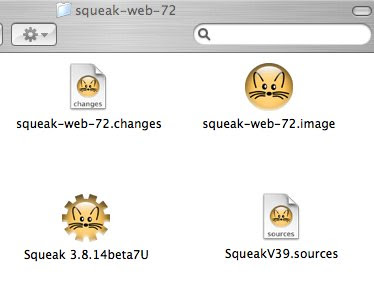
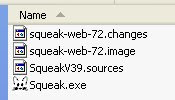
Once you have downloaded both files and unpacked them, copy the Squeak VM executable and the SqueakV39.sources file from the Squeak3.9 directory into the squeak-web directory:


Step 2 -- Up and Running
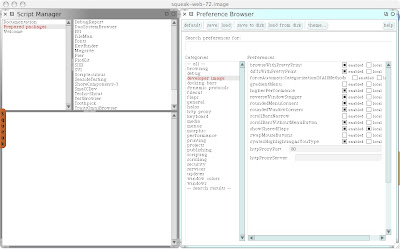
To run Squeak, click on the squeak-web-72.image file and drag it on top of the Squeak executable file. You should see something like this:

Step 3 -- A Couple of Tweaks
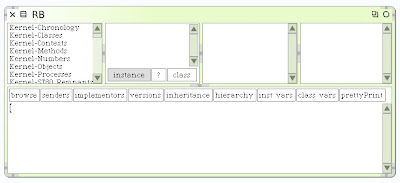
Collapse the two windows that are showing by clicking on the circle in the upper right corner of each window. Once the two windows are collapsed, you should see mostly white space. The white space is called the World. Left click on it to show the World menu. Click on "Open.." on the World menu, then click on "Refactoring Browser". This should pop this window up:

The Refactoring Browser allows you to see and edit all the source stored in the currently running image. Running along the top of the browser window are four list views.
The first list contains the image's Packages. Packages provide a way to group related classes together. Click on the Kernel-Numbers package and the second list view will display the classes in that package. Click on the Complex class and the third view will display the Complex class Categories. Categories provide a way to group related messages the class/object responds to. The fourth list displays those messages. By default, when clicking on a class, all messages are displayed. Clicking on a specific category allows you to filter the messages. Select the "arithmetic" category, then select the "abs" message. The bottom pane should show the source code for the abs message. This pane is where you will change the world.
Notice the three buttons in the bottom of the Class list view (the 2nd list): instance, ?, and class. By default, the instance button should be selected. The instance and class buttons toggle which messages are displayed: instance messages (messages that a class's object instance responds to), and class messages (those that the class itself responds to). The Complex class responds to 3 messages, all of which create a Complex instance object: abs:arg:, new, and real:imaginary:.
Step 4 -- Saving
At this point, left click on the World and choose "save as...". In the "New File Name?" dialog, enter "want-tutorial.image" and click the Accept button. If you look in the squeak-web-72 directory, you should see the new image we created. This is where we will store all code related to this tutorial. Notice we didn't save over the squeak-web-72.image file--this was left intentionally as a starting point for other projects.
We have made three changes to the want-tutorial.image that will persist for the next time we run: The two collapsed windows that were open, and the opened Refactoring Browser. That's it for this entry. Feel free to look around--you can't really mess anything up as long as you don't choose one of the "save" options from the World menu before exiting. We'll start looking at Seaside in the next entry.
Useful links:
Squeak.org
Introductions to Squeak
1 comment:
Thanks for the tip on using Damien's image. There is also another useful tutorial at http://www.shaffer-consulting.com/david/Seaside/, however it is based on seaside 2.5.
Post a Comment