Step 1: Create the Model
The Wanted model is pretty simple: a WantedItem object that contains 3 attributes:
- a title
- notes about the item
- the date the item was entered
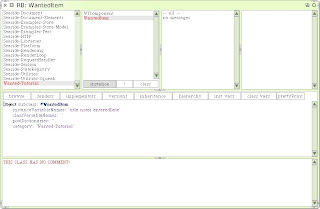
One of the nice things about the Refactoring Browser is that it can create accessor methods for instance variables. Double-click the title instance variable (inside the single quotes) so that it is highlighted, then right-click or option-click title and choose selection... then create accessors:
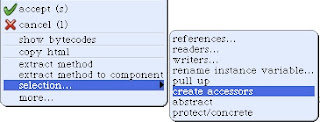
The Refactoring Browser should have created two additional methods in your WantedItem class: title and title:. These act as your getter and setter respectively. Whenever you see a colon in a message selector it means the message expects an argument--see the links in this post for help on understanding Smalltalk syntax. Notice that the message category accessing was created and that our accessors were put into it. Create accessors for notes and enteredDate and save. We now have an initial version of our WantedItem class that we can start using.
Step 2: Create an Object to Abstract Storage
One of the cool things about working with a Smalltalk image is that when you save the image, you save the state of all the objects in it. We can take advantage of this and use the image as a database by creating an object that will store our WantedItems as a collection. As long as you save the image each time before you exit it, all changes to the collection will be persisted. Once we get the application fleshed out and working the way we want, we'll move on to other types of storage.
The storage object is simple: it holds a collection of wanted items in a class instance variable. A class method will allow us to retrieve the collection and make changes to it.
Click the Wanted-Tutorial package so that it is selected and the object creation template shows in the code pane. Change NameOfSubclass to WantedDatabase and save. Click the class button in the class pane. The code pane should look like this:

Inside the single quotes after instanceVariableNames:, enter wantedItems:

and save.
Now we need to create an accessor. With the class button still selected, click on the "-- all -- " message category. Replace the method creation template in the code pane with the following:
wantedItems
   ^ wantedItems ifNil: [wantedItems := OrderedCollection new]
and save. Notice that the Refactoring Browser created a new message category "as yet unclassified". To keep things clean, right-click or option-click the "as yet unclassified" category, choose rename... and enter "accessing". We now have a very simple way of persisting our WantedItems: we ask the WantedDatabase for the wantedItems class instance variable by sending the wantedItems class message and add or make changes. Notice that if the variable has not been accessed before, a new empty OrderedCollection is created and assigned to the wantedItems variable before being returned.
Step 3: Create a Component for the Wanted List Page
Our main page in the Wanted application will display a list of saved WantedItems. From this page we will eventually provide links to add, delete, and edit WantedItems. Let's create a component to display the list.
In the Refactoring Browser, click the Wanted-Tutorial package so that the object creation template is displayed in the code pane. Change Object to WTComponent and NameOfSubclass to WantedList and save the component. Since WantedList is a subclass of WTComponent, we do not have to add the class canBeRoot method: it is inherited. We want WantedList to render differently than WTComponent, so click on the "-- all --" item in the message category pane so that the method creation template displays in the code pane. Create the renderContentOn: method by entering the following into the code pane:
renderContentOn: html
   WantedDatabase wantedItems
       do: [:wantedItem | html paragraph: wantedItem title]
and save:
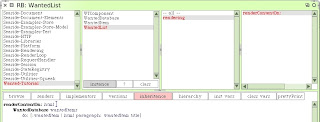
Our renderContentOn: method asks the WantedDatabase for the wanted items collection, then for each wanted item we ask the html context to emit the title of the item in a paragraph tag. This is very simplistic, but for now allows us to view our stored wanted items.
Now flip back to your web browser and go to http://localhost:8080/seaside/config. Click on the configure link next to the wanted application entry point:

In the General section of the page, change the Root Component dropdown to WantedList:
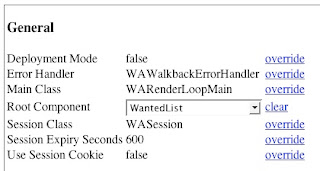
and click the save button. After the page refreshes to notify you that the changes were saved, click the done button. This will take you back to the main config page. Click on the wanted link. You should see nothing since the only thing we are displaying are wanted items in paragraph tags, and we haven't created any. Let's create one.
Step 4: Create a WantedItem to Display
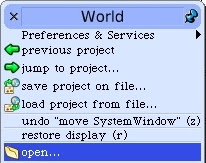
Flip back to Squeak, left click on the world, choose open...:
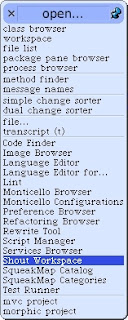
then Shout Workspace:
You should see a window like this one:
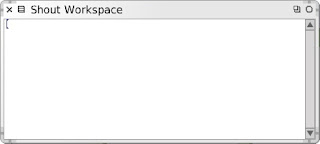
The workspace is kind of like a command line for your Smalltalk image with full access to all of the objects in it. You can evaluate code snippets, write scripts, start services, etc. The Shout Workspace adds some extra features like syntax coloring. We're going to use the workspace to add a WantedItem to our WantedDatabase. Enter the following code into the workspace:
WantedDatabase wantedItems add:
   (WantedItem new
       title: 'Nintendo Wii';
       enteredDate: (DateAndTime  now);
       notes: 'Get some exercise while having fun')
On the first line we're asking the WantedDatabase for the wantedItems (which will be an empty OrderedCollection since this is the first time we're accessing it). We immediately send the collection the add: message, passing a new WantedItem as the argument. The wanted item is created inside the parentheses by passing the WantedItem class the new message, then setting the 3 instance variables. The semicolons are a Smalltalk language feature called the cascade operator that returns the receiver of the last message (again, see this post for links to understanding the Smalltalk syntax). Highlight the entire block of code, then right-click or option-click and choose "do it":
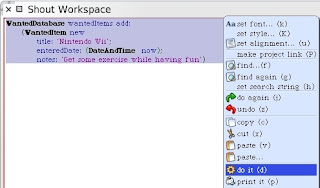
To make sure that the item was added, append the following block on its own line to the workspace:
WantedDatabase wantedItems size
Highlight it in the workspace, right-click or option-click, then select "print it". You should see the number 1 printed to the right of the block of code, letting us know that our item was added to the collection.
Now flip back to your browser and refresh. You should see the title of the item we just added in the workspace.
Congratulations--we're one step closer to world domination! Make sure to save your image (want-tutorial.image). Note that by saving the image, you'll be saving the Wii WantedItem we created. If you exit Squeak then fire it back up and go back to the wanted seaside page, it will show up again. Even cooler: install Squeak on another machine (even under a different operating system), copy the tutorial image to it, open the image and point your web browser to the seaside wanted app. You will see the same results. We now have a completely portable platform-agnostic development environment and database for our project.
In the next post, we'll look at tweaking the display of the WantedList component.
1 comment:
Awesome tutorial so far! Thanks for introducing me to the Shout Workspace. I don't know why I ignored it for so long......
Post a Comment